In this blog, we will discuss the microk8s single Node Kubernetes cluster and its features and usage.

Table of Contents
Introduction to MicroK8s Single Node Kubernetes Clusters
MicroK8s is a lightweight open-source Kubernetes distribution that is suitable for local development, learning, testing, and small-scale production deployments. It is easily scalable from a single node to a high-availability production cluster.
Microk8s Key Features
- Easy Installation: MicroK8s can be installed with a single command
- Low on resources: It requires minimal system resources, making it suitable for running Kubernetes on resource-constrained environments such as laptops or edge devices.
- Single Node Kubernetes: MicroK8s runs as a single-node cluster by default, allowing you to experiment and develop applications without the need for a complex multi-node setup.
- Plugins/Add-Ons: MicroK8s provides a wide range of pre-installed add-ons, including popular tools and services like DNS, storage, dashboard, ingress, and metrics, making it easy to extend the functionality of your Kubernetes cluster.
- Snap Package: MicroK8s is distributed as a snap package, which provides an isolated and secure runtime environment. This allows for easy installation, updates, and rollback of the MicroK8s installation.
- Fast Startup and Updates: MicroK8s has a fast startup time, allowing you to quickly start and stop your local Kubernetes cluster. It also provides automated updates to ensure you have the latest stable version of Kubernetes and its components.
- Developer-Friendly: MicroK8s is designed to be developer-friendly, with features like built-in containerd runtime, seamless integration with popular development tools, and support for popular programming languages and frameworks.
- Multi-Cluster Support: MicroK8s allows you to manage multiple clusters on a single machine, making it convenient for testing and development scenarios where you need to work with different Kubernetes configurations.
- Security and Isolation: MicroK8s provides a secure and isolated environment for running Kubernetes, with features like RBAC (Role-Based Access Control) and automatic TLS certificate management.
Installation using Snap
You can easily install MicroK8s in Linux from the command line using snap command:
sudo snap install microk8s --classic
For other platforms (Windows, macOS, Raspberry Pi, etc) and install methods, please see the MicroK8s documentation
We will add some rules in our firewall to allow pod-to-pod and pod-to-internet communication:
sudo ufw allow in on cni0 && sudo ufw allow out on cni0
sudo ufw default allow routed
Enable some plugins for DNS, Dashboard, and Storage.
sudo microk8s enable dns
sudo microk8s enable dashboard
sudo microk8s enable storage
Status of cluster and addons
sudo microk8s status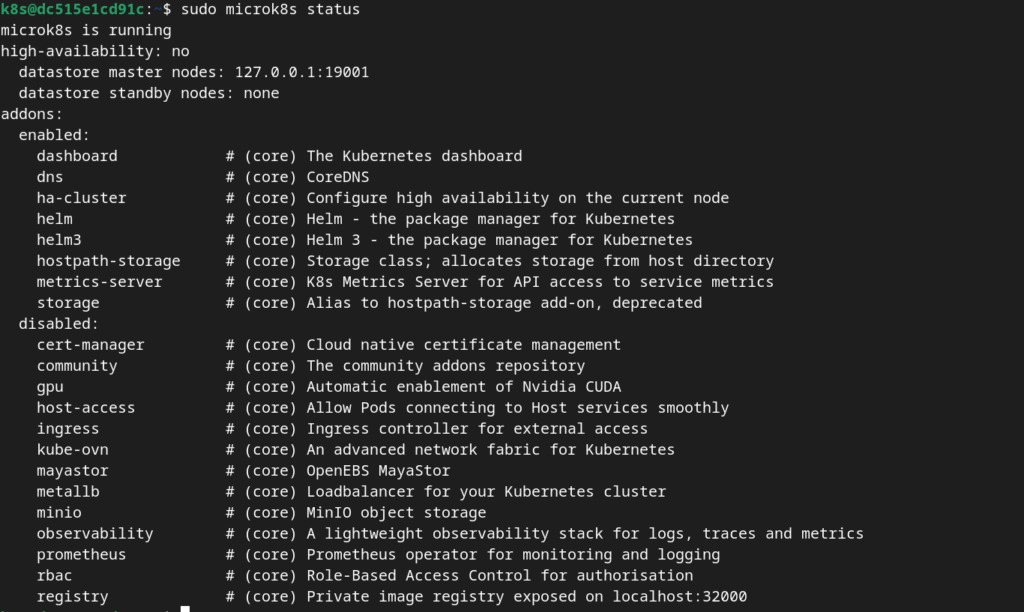
Testing Dashboard Access
We will create a Node Port Service to access the Dashboard as this cluster is deployed in a remote VM. On a local machine, you can access it directly with Service Cluster IP.
sudo microk8s kubectl get svc kubernetes-dashboard -oyaml -n kube-system > kubernetes-dashboard-np.yamlWe will add two new attributes NodePort: 30080 and type: NodePort and apply the newnode port service manifest. This will expose service on the 30080 Node Port and can be accessed from a remote location using Node IP address.
apiVersion: v1
kind: Service
metadata:
  annotations:
  labels:
    k8s-app: kubernetes-dashboard
  name: kubernetes-dashboard-np
  namespace: kube-system
spec:
  internalTrafficPolicy: Cluster
  ipFamilies:
  - IPv4
  ipFamilyPolicy: SingleStack
  ports:
  - port: 443
    protocol: TCP
    targetPort: 8443
    nodePort: 30080
  selector:
    k8s-app: kubernetes-dashboard
  type: NodePort
sudo microk8s kubectl create -f kubernetes-dashboard-np.yaml
Access dashboard application using: https://<IP Address>:30080/

Let’s get the required token to login to the Dashboard.

sudo microk8s kubectl get secret -oyaml microk8s-dashboard-token -n kube-system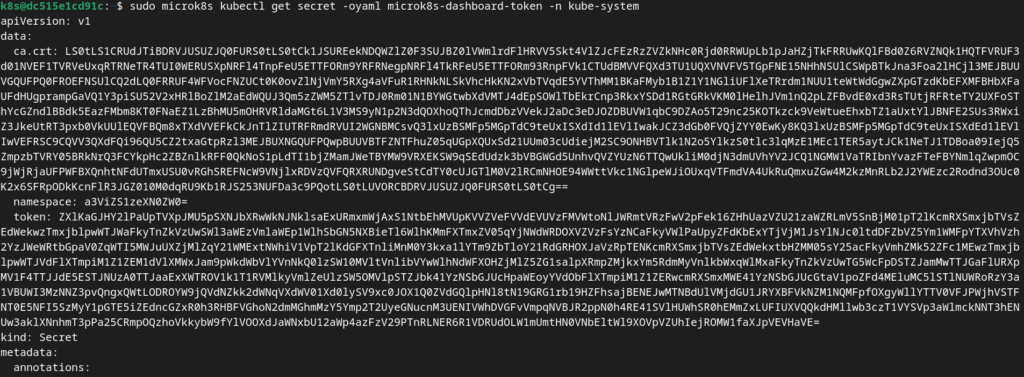
Decode token to base64 text.
echo "ZXlKaGJHY2lPaUpTVXpJMU5pSXNJbXRwWkNJNklsaExURmxmWjAxS1NtbEhMVUpKVVZVeFVVdEVUVzFMVWtoNlJWRmtVRzFwV2pFek16ZHhUazVZU21zaWZRLmV5SnBjM01pT2lKcmRXSmxjbTVsZEdWekwzTmxjblpwWTJWaFkyTnZkVzUwSWl3aWEzVmlaWEp1WlhSbGN5NXBieTl6WlhKMmFXTmxZV05qYjNWdWRDOXVZVzFsYzNCaFkyVWlPaUpyZFdKbExYTjVjM1JsYlNJc0ltdDFZbVZ5Ym1WMFpYTXVhVzh2YzJWeWRtbGpaV0ZqWTI5MWJuUXZjMlZqY21WMExtNWhiV1VpT2lKdGFXTnliMnM0Y3kxa1lYTm9ZbTloY21RdGRHOXJaVzRpTENKcmRXSmxjbTVsZEdWekxtbHZMM05sY25acFkyVmhZMk52ZFc1MEwzTmxjblpwWTJVdFlXTmpiM1Z1ZEM1dVlXMWxJam9pWkdWbVlYVnNkQ0lzSW10MVltVnlibVYwWlhNdWFXOHZjMlZ5ZG1salpXRmpZMjkxYm5RdmMyVnlkbWxqWlMxaFkyTnZkVzUwTG5WcFpDSTZJamMwTTJGaFlURXpMV1F4TTJJdE5ESTJNUzA0TTJaaExXWTROV1k1T1RVMlkyVmlZeUlzSW5OMVlpSTZJbk41YzNSbGJUcHpaWEoyYVdObFlXTmpiM1Z1ZERwcmRXSmxMWE41YzNSbGJUcGtaV1poZFd4MEluMC5lSTlNUWRoRzY3a1VBUWI3MzNNZ3pvQngxQWtLODROYW9jQVdNZkk2dWNqVXdWV01Xd0lySV9xc0JOX1Q0ZVdGQlpHNl8tN19GRG1rb19HZFhsajBENEJwMTNBdUlVMjdGU1JRYXBFVkNZM1NQMFpfOXgyWllYTTV0VFJPWjhVSTFNT0E5NFI5SzMyY1pGTE5iZEdncGZxR0h3RHBFVGhoN2dmMGhmMzY5Ymp2T2UyeGNucnM3UENIVWhDVGFvVmpqNVBJR2ppN0h4RE41SVlHUWhSR0hEMmZxLUFIUXVQQkdHMllwb3czT1VYSVp3aWlmckNNT3hENUw3aklXNnhmT3pPa25CRmpOQzhoVkkybW9fYlVOOXdJaWNxbU12aWp4azFzV29PTnRLNER6R1VDRUdOLW1mUmtHN0VNbEltWl9XOVpVZUhIejROMW1faXJpVEVHaVE="|base64 -d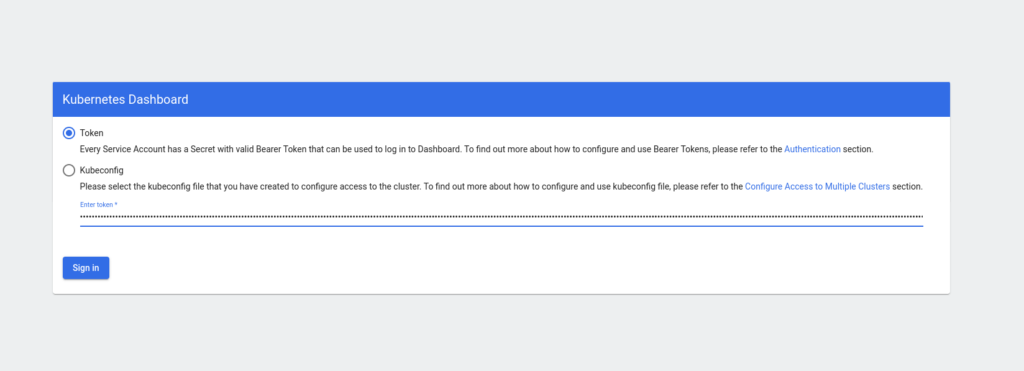
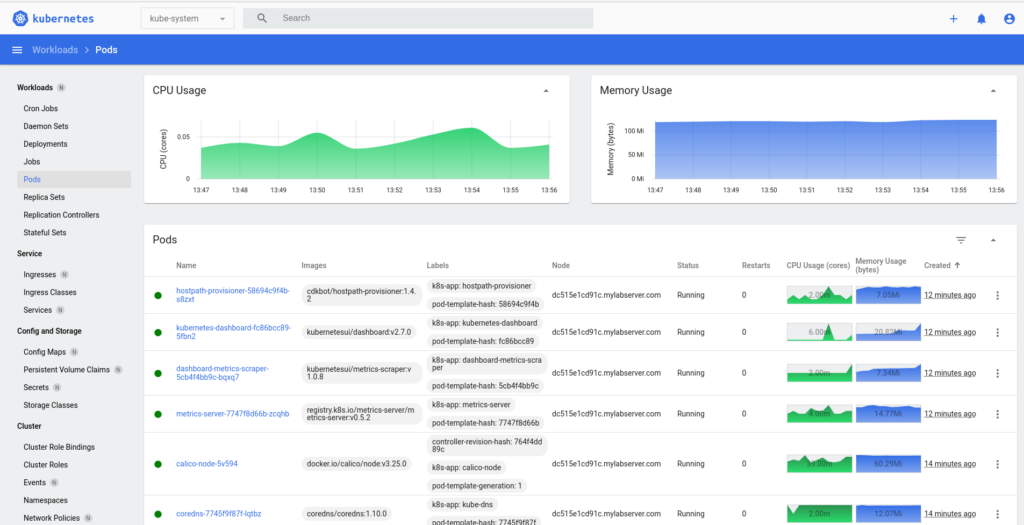
Change the namespace to “kube-system” at the top to see resources in this namespace.
Deploying Applications in Cluster
Let’s create a new namespace ‘sandbox’ and deploy the nginx image.
sudo microk8s kubectl create namespace sandboxLet’s create a deployment manifest file using the below command with a dry-run flag. Then we will edit this file as per our requirements.
sudo microk8s kubectl create deployment nginx --image nginx --port 80 -n sandbox --dry-run=client -oyamlManifest looks like this:
apiVersion: apps/v1
kind: Deployment
metadata:
  creationTimestamp: null
  labels:
    app: nginx
  name: nginx
  namespace: sandbox
spec:
  replicas: 1
  selector:
    matchLabels:
      app: nginx
  strategy: {}
  template:
    metadata:
      creationTimestamp: null
      labels:
        app: nginx
    spec:
      containers:
      - image: nginx
        name: nginx
        ports:
        - containerPort: 80
        resources: {}
status: {}
Let’s apply this file and check the status in this namespace.


Let’s create a service to access our deployed application which is just an nginx container.
sudo microk8s kubectl expose deployment.apps/nginx -n sandbox --type NodePort --dry-run=client -oyaml > nginx-np.yamlapiVersion: v1
kind: Service
metadata:
creationTimestamp: null
labels:
app: nginx
name: nginx
namespace: sandbox
spec:
ports:
- port: 80
protocol: TCP
targetPort: 80
nodePort: 30081
selector:
app: nginx
type: NodePort
status:
loadBalancer: {}sudo microk8s kubectl create -f nginx-np.yamlAccess using: http://3.8.199.34:30081/

MicroK8s with CI/CD Pipelines
Given microk8’s low resource usage it’s a great tool to add to our CI pipelines to quickly deploy and test our applications.
- Start MicroK8s: Start the MicroK8s cluster using the appropriate command, such as
microk8s.start. This will launch the Kubernetes cluster on your CI/CD environment. - Deploy Applications: Use Kubernetes manifests or Helm charts to define and deploy your applications on the MicroK8s cluster. You can create YAML files or Helm charts that describe the desired state of your application deployments, services, and other Kubernetes resources.
- Test and Validate: Perform any necessary testing or validation steps on the deployed applications. This may involve running integration tests, checking for desired behavior, or validating the application’s functionality in the Kubernetes environment.
- Cleanup: Once the testing and validation are complete, clean up the MicroK8s cluster using the appropriate command, such as
microk8s.stopormicrok8s.reset. This will remove the Kubernetes cluster and any deployed applications from your CI/CD environment.
pipeline {
agent any

stages {
    stage('Build Docker Image') {
        steps {
            // Perform build steps here
            sh 'docker build' // Example build step
        }
    }

    stage('Start Microk8s cluster') {
        steps {
            // Perform build steps here
            sh 'microk8s.start'
        }
    }

    stage('Deploy Helm Chart') {
        steps {
            // Perform build steps here
            sh 'helm deploy' // Example deploy step
        }
    }

    stage('Test Application') {
        steps {
            // Perform build steps here
            sh 'helm test' // Example test step
        }
    }

    stage('Stop Microk8s cluster') {
        steps {
            // Perform testing steps here
            sh 'microk8s.start'
        }
    }
    }
}
}
Summary
Overall, MicroK8s offers a lightweight, easy-to-use, and feature-rich Kubernetes distribution for local development and testing purposes.
To learn more about security please read our security blog.
To learn more about containers please read our security blog.
